 1900
1900
Open Cloud CMA and select the Buyer Tour tab, then click on the “Create a new Buyer Tour” button.

Enter your Clients name and the listing numbers that you wish to be in the buyer’s tour, then click on the “Fetch Listings button.

Organize/sort your listings by selecting from the drop down, or orange them individually by clicking on the grid to the left of the listing then dragging it to your desired location. You may also exclude listings by unchecking the box in the upper right hand of each listing which will remove them from the report. Once you have organized the listings as you desired click on “Customize report” button.

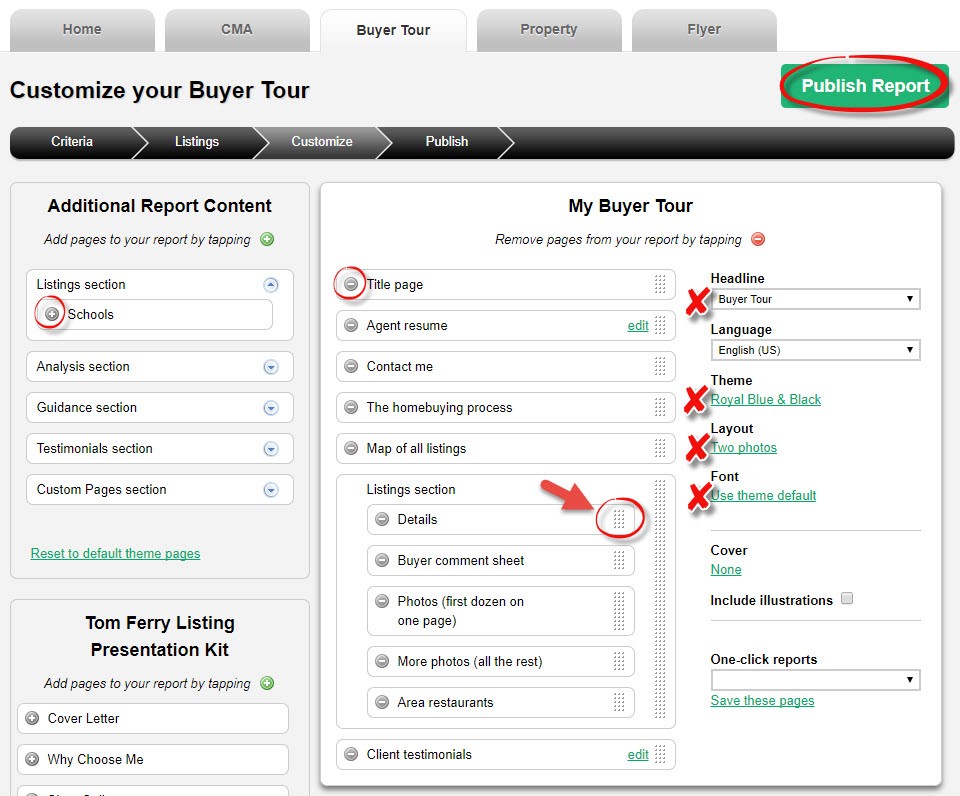
Add or remove fields using the plus and minus signs on the fields themselves, organize those fields by clicking and dragging using the grid to the right of the field. Select your Headline from the drop down. Select your theme, layout and font by clicking on the appropriate link on the right of the page. Once everything is as you desire click on “Publish Report”.

Your buyer tour is now complete, you may now view, present, email, or share your Buyer Tour Report.


